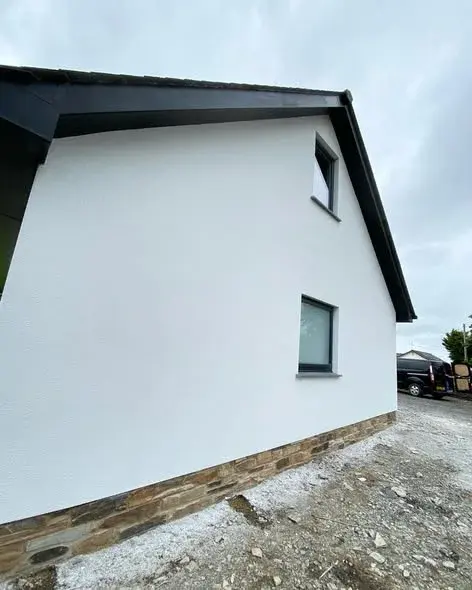
5 Signs Your Render Needs Replacing (Not Just Patching)
Most render problems look the same from the pavement — cracked, stained, or patchy. But some are a simple patch job and some mean the whole lot needs to come off. Here's how we tell the difference when we arrive on a job.
Sign 1: Big structural cracks vs fine crazing
Fine crazing — that spider's web of hairline cracks across the face of old render — is normal on cement-based systems that are getting on in years. It's a cosmetic issue. The render is still bonded to the wall and still doing its job; the surface has just dried out and the top few millimetres have shrunk slightly over time. A crack you can't get a fingernail into is almost always just crazing. It doesn't mean the render needs replacing — but it's a sign that the system is ageing and you should keep an eye on it.
Structural cracks are different. These are wider, often run in a defined direction, and may follow the mortar joints in the blockwork below. If a crack is wide enough to see daylight into, wide enough to let water track down inside it, or if it's appeared relatively recently, it's telling you something about movement in the building. Patching over a structural crack without understanding what caused it is a waste of money — it will crack back. In these cases the underlying issue needs addressing before any new render goes on.
Sign 2: Hollow spots when tapped
The tap test is the first thing we do on any render survey. You walk the wall slowly, tapping with your knuckles or the handle of a trowel. Where the render is well bonded you get a solid, slightly dull sound. Where it's delaminated — separated from the wall behind it — you get a hollow, drum-like echo. Sometimes a whole panel the size of a dinner table is hanging off by almost nothing.
Small hollow patches — say a 30cm section around a pipe or a corner — can often be cut out, the surface keyed up, and re-rendered cleanly. But if the hollow areas are widespread across an elevation, it tells us the bond between render and wall has broken down over a large area. That can happen because of water ingress, because the original mix was too strong or too weak, or just because the system has reached the end of its life. At that point you're better off stripping the lot than patching dozens of individual hollows — new patches next to old sound sections look awful and move differently as temperatures change.
Sign 3: Persistent green or black staining
Algae and mould growth on render is a surface issue in the first instance, and it's very common on north-facing walls in Cornwall — the combination of Atlantic rain and low direct sunlight means biological growth can establish quickly. A thorough clean with a biocidal wash, followed by a weather-resistant masonry paint or a hydrophobic coating, can deal with it if the render underneath is otherwise sound.
The warning sign is when the staining comes straight back within a season of cleaning, or where you can see heavy algae growth concentrated in particular areas that also feel damp to the touch. That pattern usually means water is getting into the render and sitting there — either through cracks, through failed joints around windows, or because the render is so porous it's effectively absorbing rain instead of repelling it. Clean render doesn't stay saturated; saturated render grows algae fast. At that stage you're masking a deeper problem rather than solving it.
Sign 4: Bulging or visible lifting
If a section of render is visibly bulging outward from the wall, there is water behind it. What has happened is that water has got in through a crack or failed seal, saturated the gap between the render and the wall, and the render has lifted away from the substrate. In cold weather that water freezes, expands, and accelerates the process. On a cornered section of render you can sometimes see it pulling away from the return at the reveal.
Bulging sections are a safety concern as well as a performance one — a large panel of old cement render falling off a two-storey wall is not something you want happening. Any area that is visibly delaminating needs to come off. There is no patch for a bulge — cutting it out and re-rendering clean is the only proper fix, and while you're at it you need to identify where the water is getting in and seal it properly before the new render goes on.
Sign 5: Cement render on a pre-1919 solid stone or brick wall
This is the one that catches people out, and it's particularly relevant in Cornwall where a lot of the older housing stock is solid granite or stone construction. Houses built before around 1919 were designed to breathe. The walls are solid — no cavity — and moisture from both inside and outside was managed by materials that allowed vapour to pass through them: lime mortar, lime render, lime wash. The whole assembly was permeable by design.
Cement render is not permeable. It's hard and water-resistant on the outside surface, but if moisture gets in through any gap — a crack, an open joint around a window, any small defect — it can't get out again through the render. It migrates inward through the wall and appears as damp on the internal face. We've seen this on plenty of Cornish cottages where well-meaning previous owners or builders put cement render onto what was originally a lime-built wall. The render itself might look fairly intact from outside, but the internal walls are damp and the problem will continue until the cement system is stripped and a breathable alternative is used instead. That's not a patch job — it's a full strip and re-render with the right system.
How to get a proper diagnosis
The tap test is a good start — walk the wall and listen. A solid knock means it's still bonded; a hollow drum means it's delaminated. Do this on every elevation if you can, not just the one that looks worst. Problems found in one elevation are often present on the others too, just less visible.
For older properties where you're not sure of the original construction, a moisture meter reading on the internal wall is useful context. If you're seeing unexplained damp on internal walls and the property has cement render on a pre-1920 stone or brick structure, that's usually enough of a clue. When we come to quote a job we do a full survey walk as standard — checking substrate type, tapping for hollows, looking at junctions and seals, checking moisture levels where we can access them. That survey is what the quote is based on.
Patch vs strip: our rule of thumb
Patch when: there are isolated hollow sections (less than roughly 20% of the elevation), the rest of the render is sound and well bonded, there are no damp issues internally, and the existing render system is compatible with the substrate.
Strip and re-render when: hollow areas are widespread, there is water behind the render, the render is fundamentally the wrong system for the building type, or the existing finish is so far gone that any patches will look noticeably different and move independently. In the long run, stripping and starting clean with the right system almost always works out cheaper than repeated patching over the following years.
Got a job in mind?
Call us on 07761 735022 or message on WhatsApp. Free quotes, no pressure.
Related articles
Written by the PureRend team — plastering and rendering specialist in Bude, Cornwall.